Computer Controlled Cutting
Group assignment:
Charactrize lasser cutter’s Focus, Power, Speed, Rate .
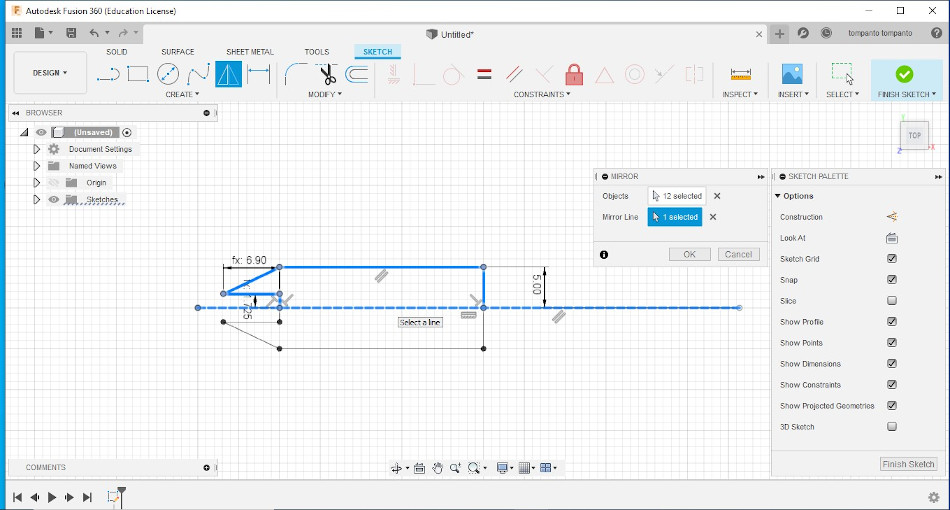
Kerf value – its the allowance value added or reduced to compensate tool with( here its laser beam)
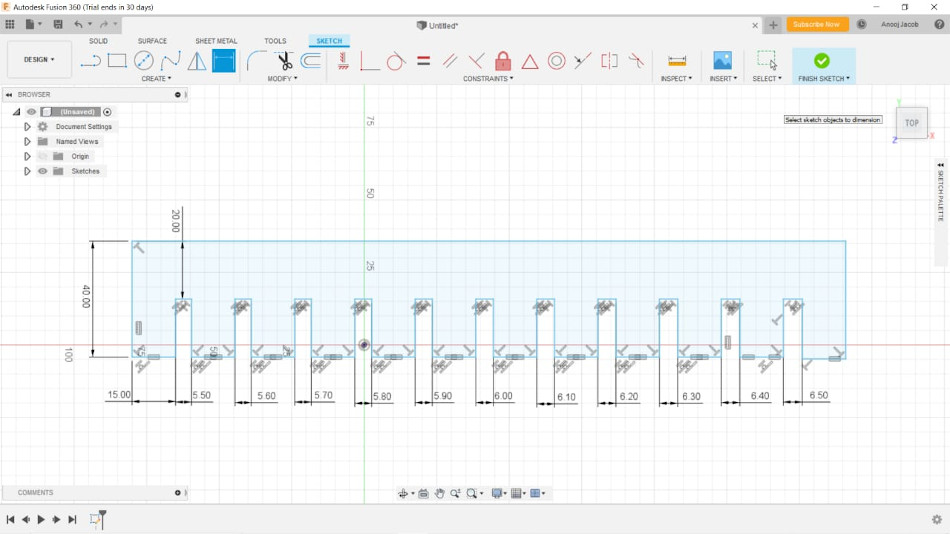
Experiment for determining the kerf value of our TROTEC laser cutting machine.
1. Selected 6 mm acrylic sheet and measured the actual thickness using Vernier and found out to be 5.80 mm
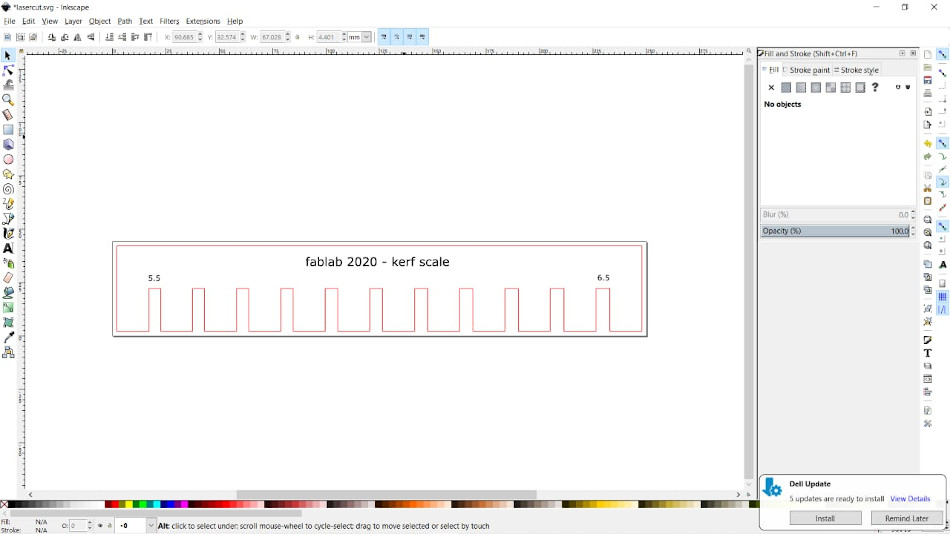
2. Designed kerf scale using rectangle slots arranged serially with an increment of 0.1mm(5.5 mm to 6.5 mm)
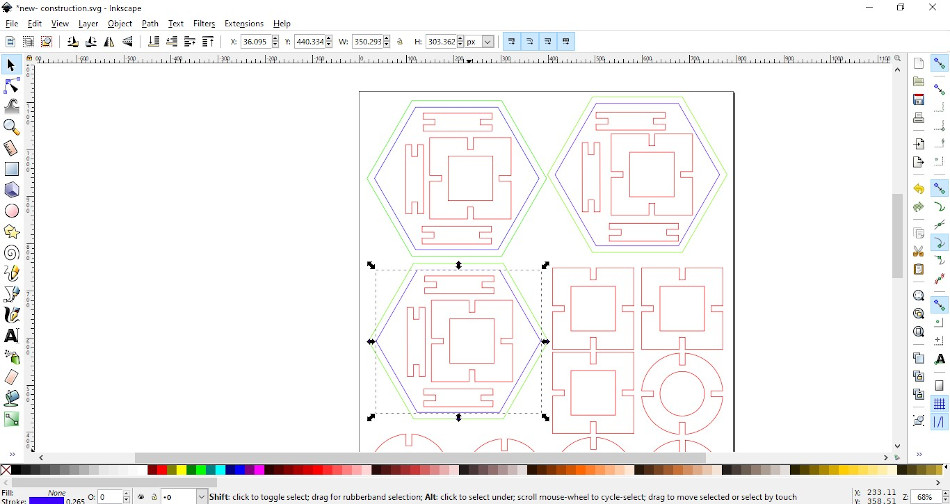
3. Save the image/design in DXF format and open in INKSCAPE for coloring the boundaries of model.
Used color coding for understanding different operations
- RED- For Cutting
- BLACK- For Engraving
- GREEN- For Cutting order
- BLUE For Cutting order
4. Go for PRINT and select TROTEC laser cutting machine ( if connected ). The trotec interface platform will be opened. firstly we need to create the materials database. Give materials details, Color codings, Power, Pulse, veolcity etc and save it.Once saved we can use it for later works.
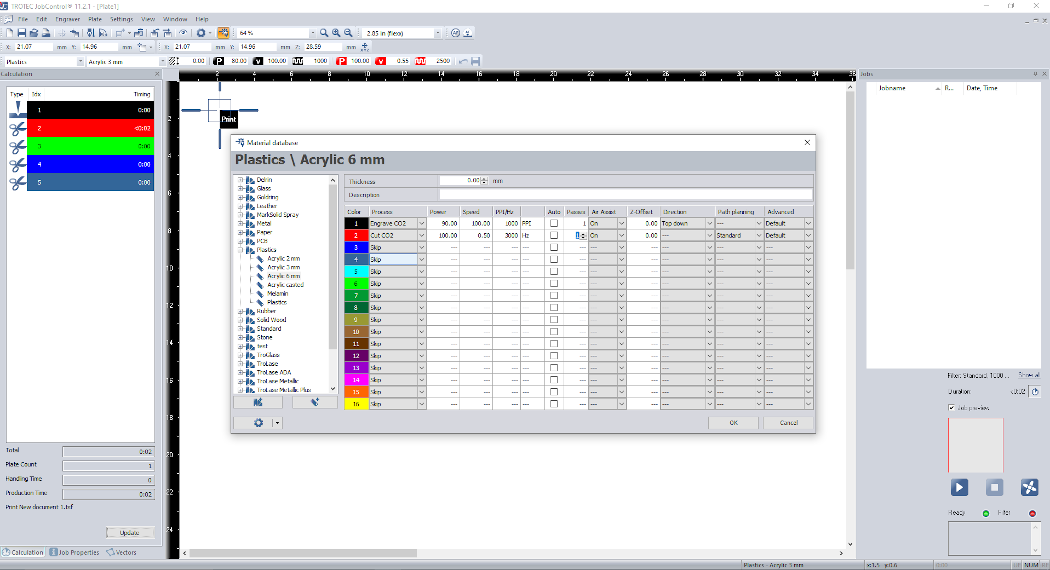 5. Machine preperation-
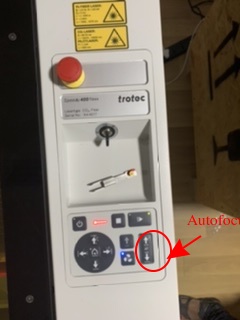
Focusing of Laser beam can be done by Auto Focus button or by using manual methods. Auto focus can be enabled by pressing up key and downkey simultaneously. Manual process need focus tool. This is hanged on laser head and bed is moved up until the focus tool just touches the bed. Tutorial for Focusing
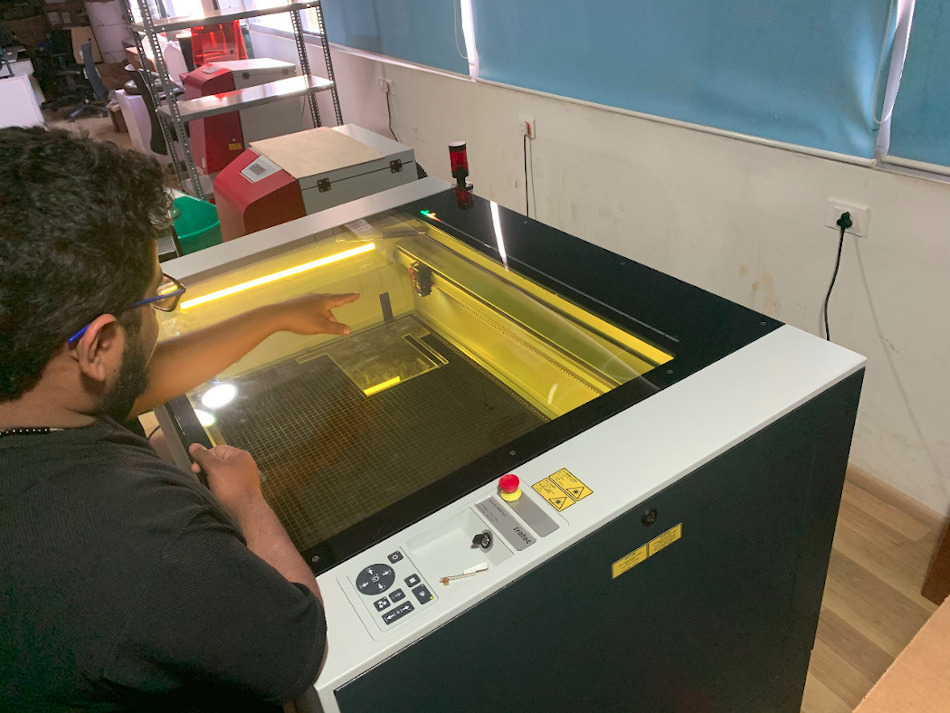
Check for incoming air and exhaust.
6. Now click refresh in the trotec application. You can see a cross symbol on the worksheet. This denotes the laser head position. Now drag and drop the cutting file to the convenient quadrant of the cross symbol.

Printing in progress
Individual assignment:
1. Design, lasercut, and document a parametric press-fit construction kit, which can be assembled in multiple ways. Account for the lasercutter kerf.
2. Cut something on the vinylcutter
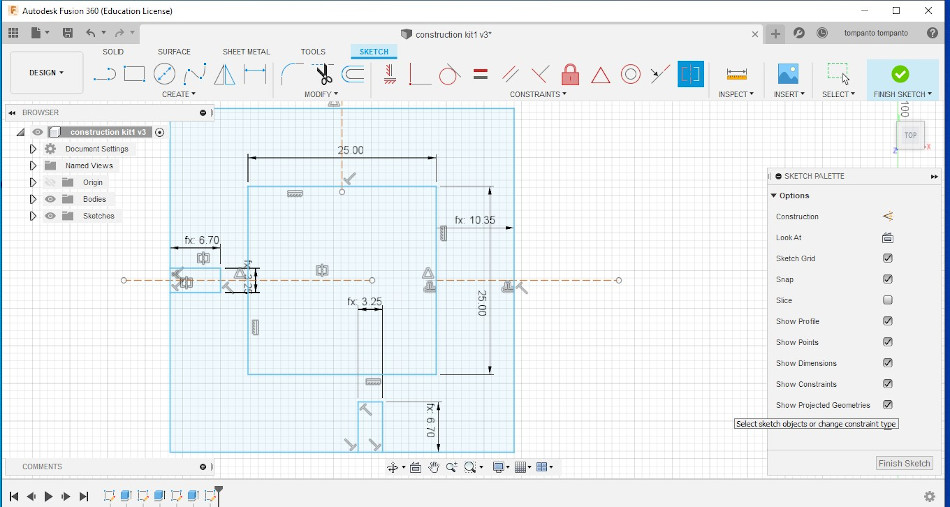
‣ Parametric designing for Construction Kit
Paremetric designing in modelling means giving constraints to geometrical dimensions or setting user parameters while designing. When a user parameter changed or modified then the entire geometry shape will get changed.
# I used parametric designing to laser cut some constructional kit for my assignment.
# I defined 3 user parameters- length, thickness of sheet and kerf.
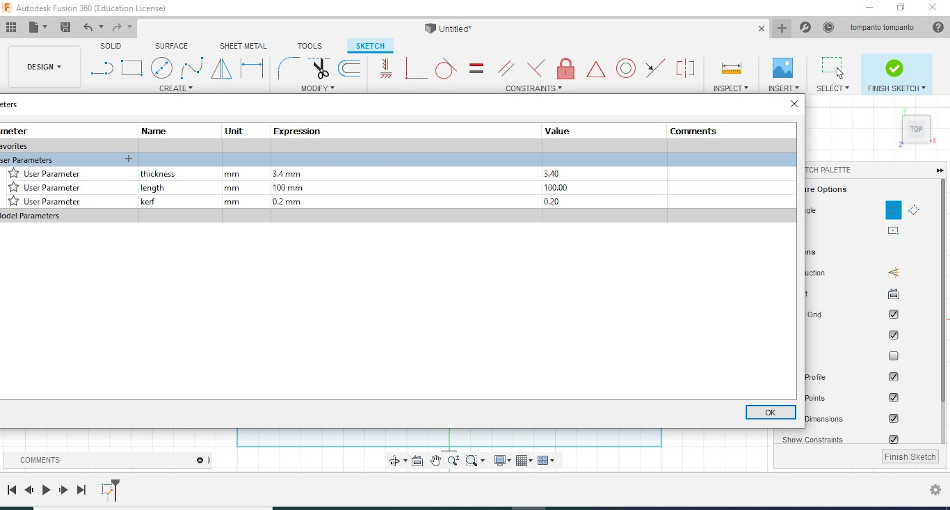
# For my construction kit i slelcted a cardboard with an average thickness of 3.45mm. I tried out to design 5 shapes.
# The picture depicts the various dimentions of design with constraints and parametric feature
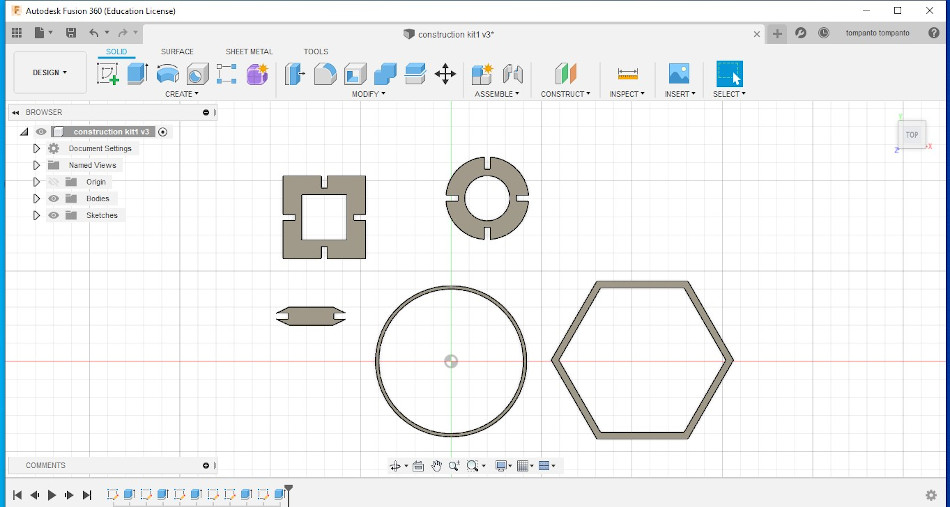
# I have made 5 models to do this assignment. I only intent to connect this shapes
# Using Inkscape I have given color coding for laser cutting
# Setting material database

# Laser cutting in progress

I assembled all the shapes after Laser cutting and finally it looks like this!!!...
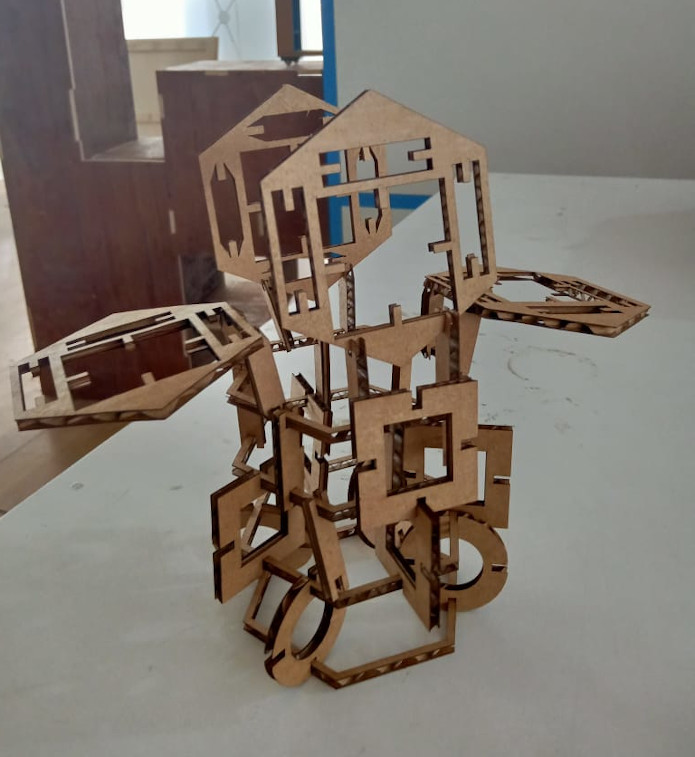
This exercise helped me to unserstand the 'fit' concept. Learned the methods to join parts/pieces acrylic or cardboard with out using any kind of fasterners
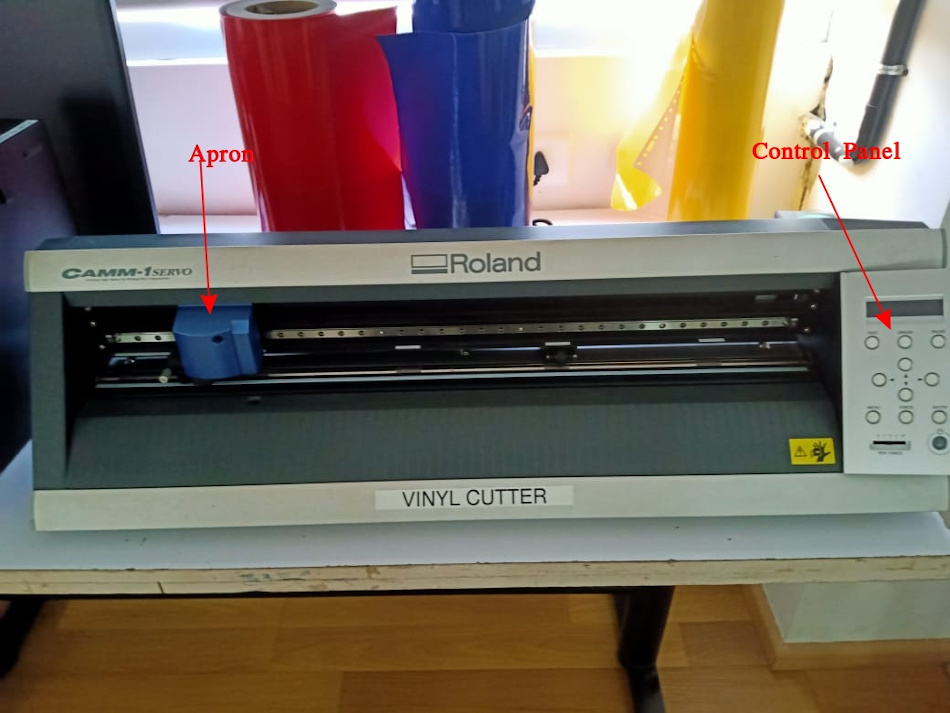
‣ VINYL CUTTER
Vinyl cutter is a machine used for cutting and engraving operations typically for different types of vinyls. Digital data is fed to the machine. Roland cutter has several features to make our job easy. LCD panel , precise blade groove on its apron for easy manual cutting, an included roller base that keeps feeds straight, and a handy stand to comfortably hold vinyl roll
Some notable features of roland camm model
Before going to do the vinly cutting in Roland inyl cutter, I installed Mods for controlling vinly cutter. Mods tool is a wonderful tool which helps to communicate with many machines through one platform.
MODS-What is mods?
Mods community edition is a fork of CBA mods research project. mods is a modular cross platform tool for fablabs. It is based on independent but interrelated modules. mods could potentially be used for CAD, CAM, machine control, automation, building UI, read input devices, react to to physical models, and much more. The possibilies are endless.
I followed the TUTORIAL's steps/commands to install in my linux.
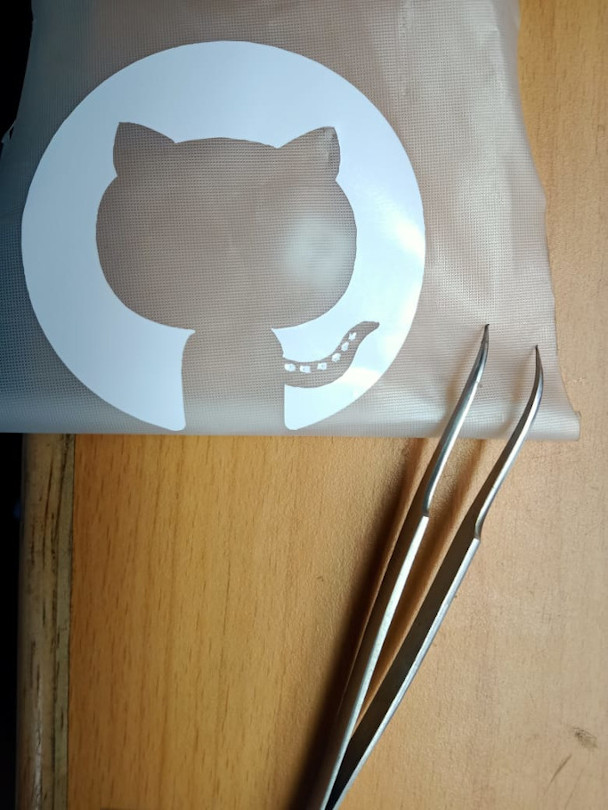
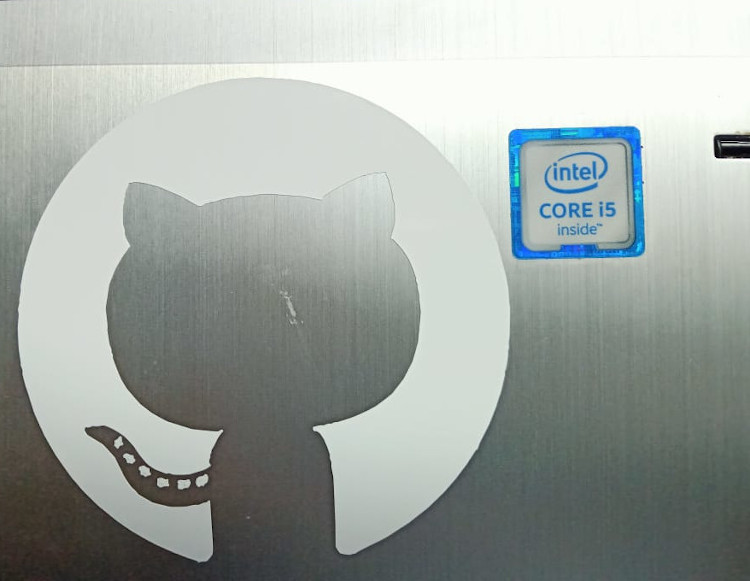
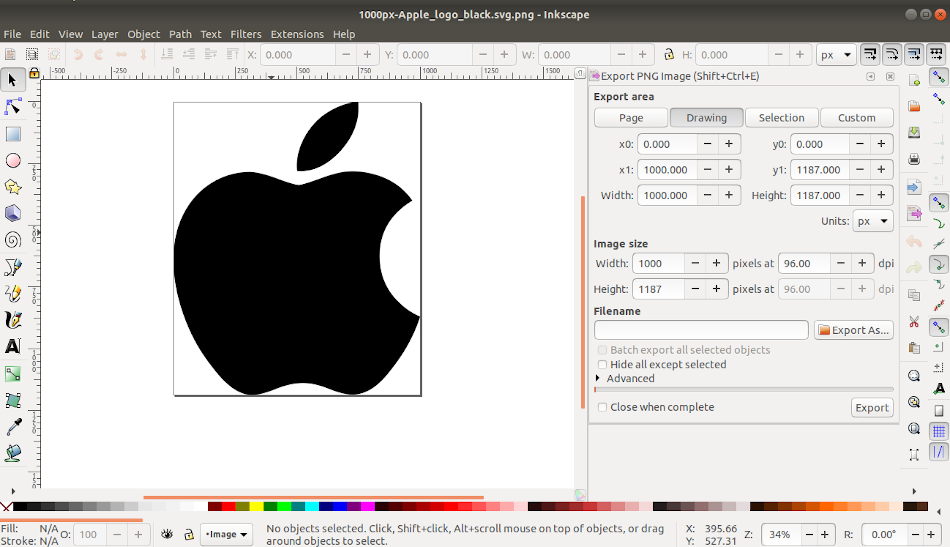
For my assignment i tried to cut a git logo which i downloaded from my internet. Then I imported into inkscape for editing. the using MODS i uploaded the logo to Vinly cutter.
Steps I followed
- Run bash start-servers inside the mods directory and browser will open FABLAB MODS
- Then right click and open ‘programs ’ and you can select machine in which you want to do the work.
- Slected ‘ROLAND’ GX-GS 24 vinyl cutters- cut
- For testing i directly uploaded a png image of APPLE Logo. Check dpi. You can vary the dpi for geting diferent size of image.
- Set parameters- Force, velocity
- Click- Calculate
- Click- ‘Open socket’ from ‘ Websocket Device’
- if server is connected it will show-’opened socket’
- Click- “Send File to Device’
Workpiece( Vinyl) is taken out using masking tape after the cutting operation. Later this can be used to paste
it on a surface conveniently using masking tape.
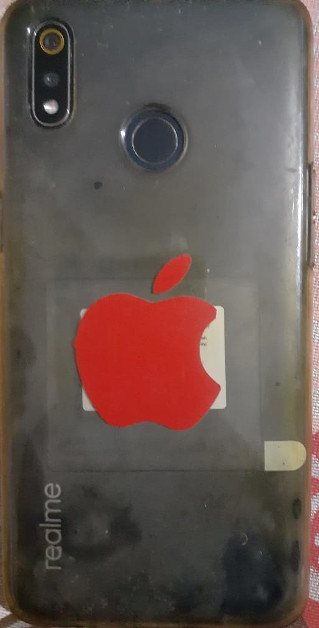
As a trail we tried "Apple" logo. Later i tried GITHUB Logo pasted on my Laptop